Showing posts with label Crafts. Show all posts

Friday, August 31, 2012

Pac-Man Body Pillowcase

Hello ya'll!

So this week was my first week of nursing school. It was a quite overwhelming. I only have classes 3 times a week but with the classes being around 2-3 hours a pop, it's very difficult to stay alert and to concentrate on the subject...especially when your stomach growls. Embarrassing!

Today, I feel kind of sad. I don't even know why! I'm thinking it's the pressure of nursing school but I also feel like it's something else. I just don't know what! :/ I hope it clears up soon! I have so much to read and so much to learn and relearn...I don't know how it's gonna fit in. My social life this week totally disappeared and I wasn't even as busy as I will be later.

All I can do is pray for the best!


Here I'd like to share with you a pillow I made for my best friend! I would only do this for her because she has helped me so much throughout our friendship and always encourages me to do my best. I made her a Pacman pillowcase! :D


I hand stitched the front of it. It took hours! But it looked very clean! Haha. (This was the unfinished version.) I used a sewing machine to sew the pillowcase together though.


It's funny how I made her this and I don't even have a proper cover for my own body pillow! Haha I think this looks really cool! The actual pillowcase is made of black flannel. The pacman parts are made of different color fleece.


I actually decided not to include the eyes in the finished product because they might come off during washing!


There it is! Haha. Sorry, not much of a tutorial or anything. Actually...just a story. Happy fall everyone!


Saturday, June 9, 2012

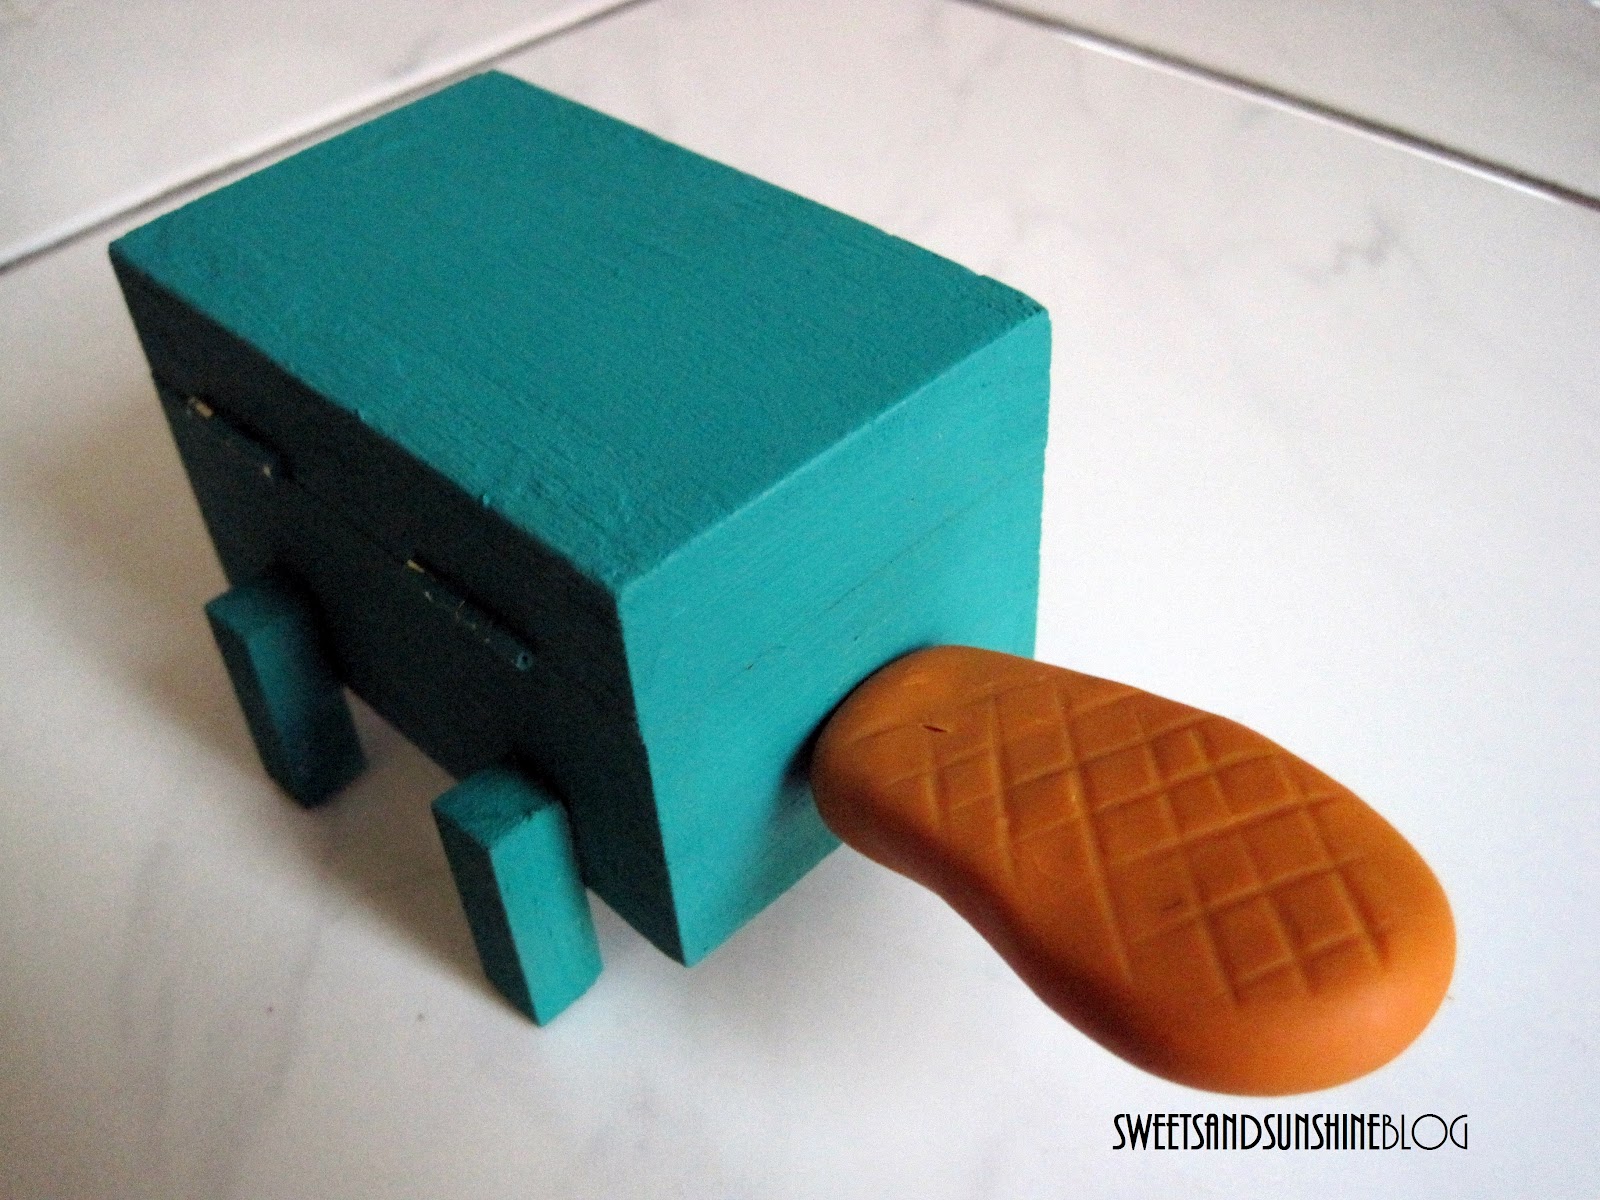
Perry the Platypus Inaction Figure

Hello! So I found out that I'm still on the wait list at my university for nursing. I moved up a lot, but am still on it. It's kind of upsetting that they're giving me false hope. It was orientation today and all I felt was that I shouldn't be there. I'm not even accepted into the program yet. But all I can do for now is wait. I have a back-up plan. My dreams are almost there, I can almost reach it, not quite, but I'll get there somehow. No matter what twists and turns my life takes, the only thing I can do is go with it and pray for the best!

Perry the Platypus Inaction Figure

Today I'd like to share with you a project I did a while back! It's one of my favorite crafts, especially since its Perry the Platypus from Phineas and Ferb! This show is brilliant! No matter what age you are, you'll find something to love about this show! On one episode, Phineas and Ferb attempt to become toy makers because toys they found would quickly become boring and monotonous. They design a toy that doesn't do anything, therefore, can do anything that they imagine; a toy that was "so stupidly simple, so basically bland, so idiotically uncomplicated, that it can do absolutely anything." Hence, Perry the Platypus Inaction Figure was born!

As a huge fan of this show, I wanted my own inaction figure! What better way to have it than to make it! Although it's not an exact replica of the figure, it's still amazing in it's own way. It actually DOES something!


Voila! You can open it to find a neat little storage compartment for your little knick-knacks! Cool huh? Well I thought so! 

This project is actually very simple, and not very costly. You could probably make around 5 of these little guys for under 8 bucks.


Components:
Sculpy oven-bake clay in mustard yellow and dark orange
2 screws
Teal craft paint
Small wood box
Wood yard stick, around 1 1/2 cm in width
Small saw or knife
Sandpaper
Wood glue
Googly eyes

Directions:
  1. Cut 1 inch pieces off of the wood stick and sandpaper both ends until smooth. This will be Perry's legs.
  2. Paint all wood pieces teal, apply 2 coats.
  3. With the mustard yellow, make the beak by rolling a small amount of clay into a flat oval shape and fold in half. To make the tail, make a shape almost like a circus peanut, or a thumb. Score the tail to get the tail look.
  4. Bake clay pieces as directed.
  5. Glue dry wood legs onto the box, leaving around 3/4 inch hanging.
  6. Mark the area that you would like your clay pieces to be. Mine were around 1/2 cm beneath the opening of the box.
  7. From the inside of the box, screw together the box and the screw until it gets to the painted side. Next, screw on the clay pieces.
  8. Glue 2 googly eyes above the beak.
That's it! There you have your Perry the Platypus Inaction Figure! So simple and so cute! Sorry though, my directions are not too great! But I hope you get the gist of it!


Wednesday, June 6, 2012

Antiqued Frames

Hello all! So today I went to the Natural History Museum and I finally saw real dinosaurs! Well, you know, the bone structure and all. It was amazing! The ones that stood out most were the ones at the museum hall entrance, a T-rex and a triceratops! They also had a preserved coelacanth, which is a fish that was thought to be extinct but showed up in Africa! I didn't know they were real! The gigantic fish that I always wanted to catch in Animal Crossing for Gamecube! HAHA Oh, how I miss those days!

Definitely a day well spent, although I was kind of sad that I got tired so fast! I guess when you get older, you start to get tired more easily? Maybe that's why my parents were always so tired when we spent the day at the amusement park! I now understand how they feel...and I also understand why they never want to go on all the rigorous rides! When I was little, I used to be able to ride roller coasters 6 times in a row without feeling sick at all! But now once I ride it once, it's all over! :( Now I find myself taking dramamine every time I go to amusement parks or long car rides.

Speaking of antique and extinct, let's get to my frames! HAHA So I guess I've jumped on to this retro bandwagon that's been going on for quite some time now! Vintage and antique items! I simply adore them! They make everything look more chic and unique and bring so much character! When we moved to our new house, I wanted all my furniture to be vintage looking. Unfortunately, I failed, but I was still able to get a nice vintage inspired desk from Pularski.

With that said, I had no idea what to put on my walls! I finally decided that I would just paint some old frames that no longer matched our furniture and wahlah! My antiqued frames came to life!

 :D This was actually my first time that I antiqued anything so I didn't know what to expect. It actually turned out okay!

Here's what you need:
Wooden frames
Paint (brown, yellow,green, white)
Brushes/foam brushes
Crackle medium
Sandpaper

It's actually really simple. You start off the first coat with brown paint. Once dry, paint spots of green and a little bit of yellow. After, apply crackle medium to areas of the frame. The top coat painted after the medium dries with white. After just sandpaper your frames to give it an older distressed look.

I know that I didn't explain it well, but it's actually easier to Youtube it! If anyone has any tips on antiquing, please tell me! I would like to antique a small side table! I have yet to put these on my wall since I have no inspiration on what to frame! I feel like putting a black background like the picture below would be too dark! We'll see!

Anywho! Thanks for reading! Just a heads up, I'm going to be doing another Hunger Games bread! District 11! So watch out for that! :D