Saturday, June 30, 2012

Stuffed Grape Leaves (Dolmades)

I went to the aquarium yesterday! :D Finally, after 2 years! (I know that's not that long...)

Aquarium!
Have I ever told you how much I adore the ocean and the animals in it? For as long as I can remember I always loved the ocean. I don't know if it's because it has this wonderful blue color...or maybe because it's so mysterious yet welcoming. When I was small, the first thing I remember saying that I wanted to be when I grew up was a marine biologist. Seriously?! What kind of 6 year old knows what a marine biologist is, yet alone what they do! But apparently I did know and I really wanted to be one!

The only downside of it is that I don't know how to swim...and I'm pretty sure you need to know how to swim in order to work with marine creatures. Well hey! I can swim a little...but really, I'm not sufficient enough to do anything rigorous. I'm terrified of snorkeling...scuba diving is a little better, but still bad.

Anywho, I'd like to share with you a dish I made awhile back. It's a Greek(?) dish made from grape leaves, white rice, dill, mint, lemon, and ground meat. They're stuffed grape leaves!

Stuffed Grape Leaves (Dolmades)
I went into my local market and saw fresh grape leaves so I thought to myself...I wonder what you use these for. Instead of asking people and looking up recipes before buying it, I just stuffed a bag with a bunch of nice  leaves. It was totally impulsive but when am I ever not impulsive. I always buy random food that I see...this is why I went home one day with a pound of fresh almonds and another day with prickly pear cactus fruit. When I got home I immediately looked up what you do with grape leaves and saw this recipe for stuffed grape leaves.

I've never actually eaten or seen stuffed grape leaves in person previous to making them so I didn't know how they would turn out. I didn't even know how they would taste. BUT they tasted amazing! I actually liked it better without the grape leaves though. It was kind of sour for me. I actually ate it again at a buffet when I went to Vegas and I think it doesn't get any better than this! The inside was amazing! I really didn't know that mint could be used for more than desserts and garnishes! It works perfectly with the dill!


Stuffed Grape Leaves:
Makes about 25-30 parcels

Ingredients:
2 cups uncooked long-grain white rice
1 large onion, chopped
1/2 cup chopped fresh dill
1/2 cup chopped fresh mint leaves
1/2 lb cooked ground meat
2 quarts chicken broth
3/4 cup fresh lemon juice, divided
60 grape leaves, drained and rinsed
hot water as needed
1 cup olive oil

Directions:
  1. In a large saucepan over medium-high heat, saute the rice, onion, dill, and mint for about 5 minutes, or until onion is soft. Pour in 1 quart of broth, reduce heat to low and simmer for another 10 to 15 minutes, or until rice is almost cooked. Add the cooked ground meat. Stir in 1/2 of lemon juice and remove from heat.
  2. Take one leaf, shiny side down, and place 1 teaspoon of the rice mixture at the bottom (stem) end of the leaf. Fold both sides of the leaf towards the center, roll up from the broad bottom to the top, and place into a 4-quart pot. Repeat with all leaves, leaving no gaps as leaves are placed in pot (to prevent from opening while cooking). Sprinkle with remaining lemon juice and with olive oil.
  3. Pour chicken broth over all to cover grape leaves. Cover pot and simmer for about 1 hour (do not boil, because this will make the stuffing burst out of the leaves). Remove from heat, remove cover and let cool for 1/2 hour. Transfer to serving dish and serve.
Note: If you use fresh grape leaves dunk it in hot water for around 10 seconds so it softens up, but make sure not too long or else it will lose its nice green color. 
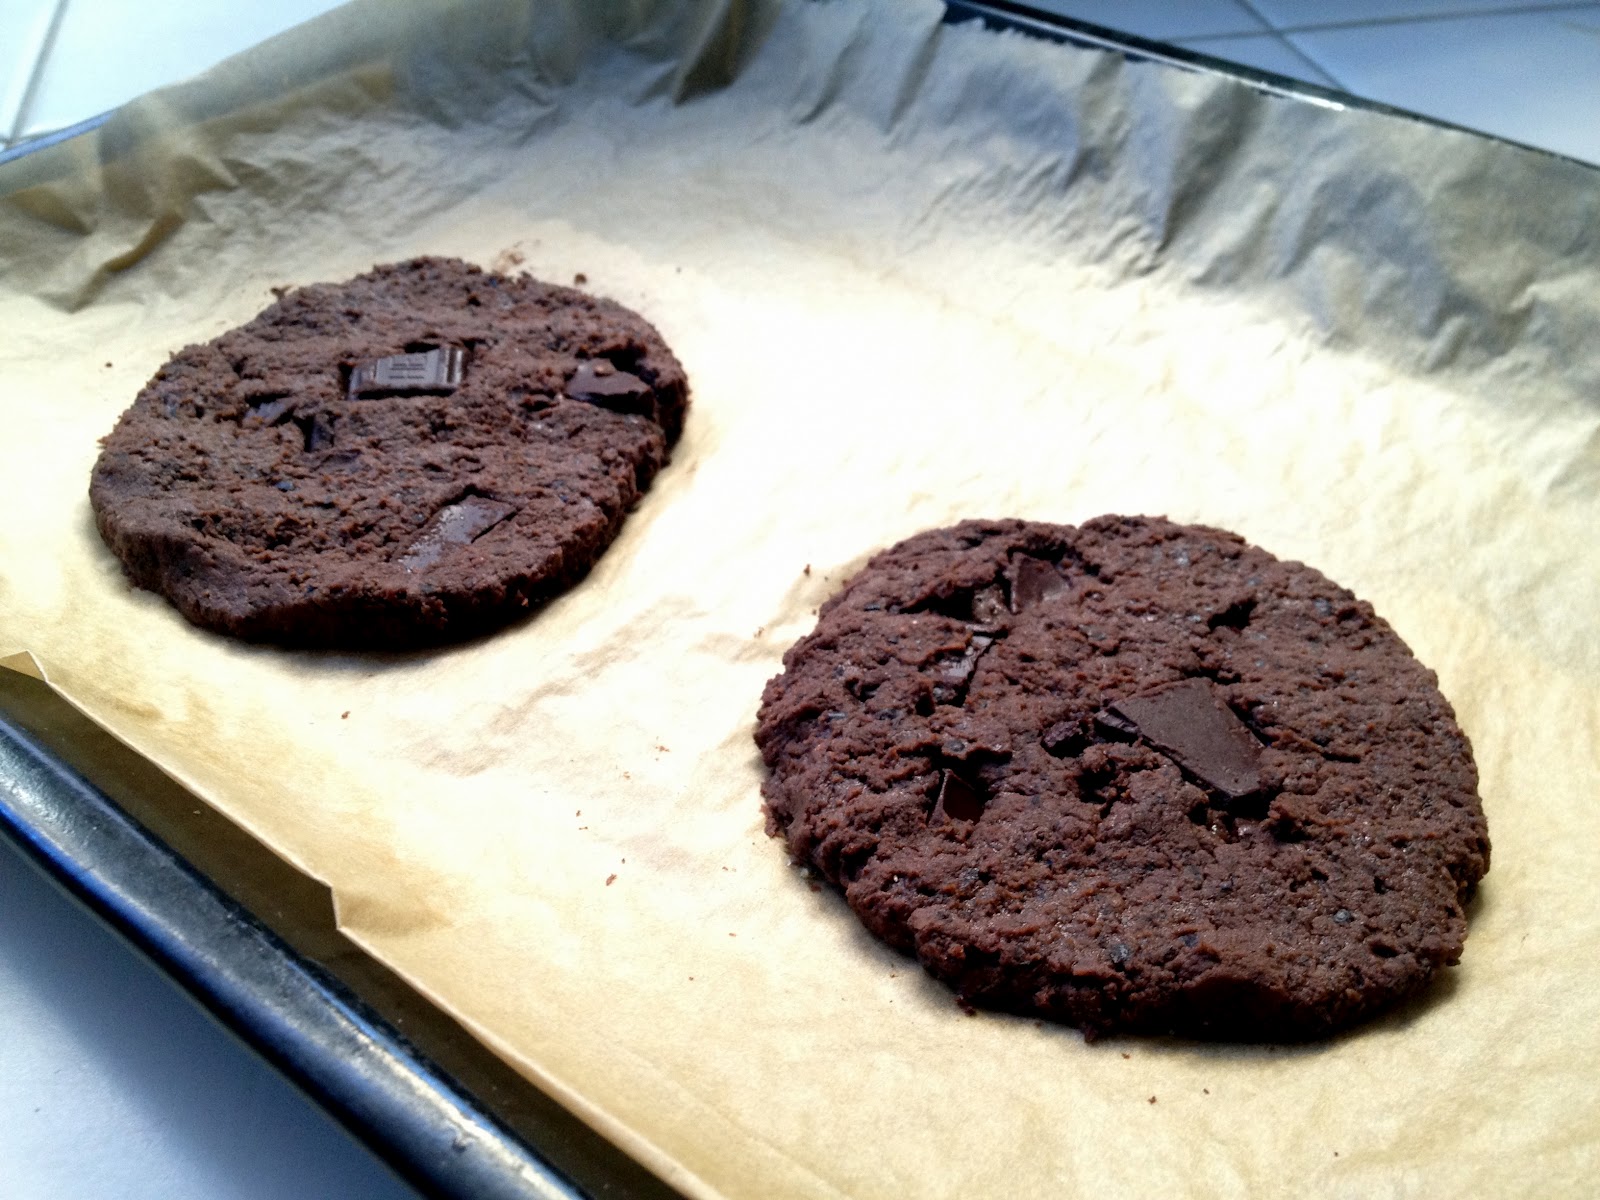
Thursday, June 28, 2012

Black Bean Chocolate Chili Cookies


So this past weekend I went to Las Vegas! Woo! Well.. not really. As you know, I'm still under age so I can't really do much there yet! It still had good eats though!

Earl's Club from Earl of Sandwich
My group actually ate at Earl of Sandwich 2 times during our trip! It was too good to resist! It was my first time there and I definitely recommend it! I liked the tuna melt the best. Earl's is in Planet Hollywood. There was not really many peaks to my trip, factoring in the 100+ degree (F) weather and the fact that I only was able to get ONE hour of sleep the first night. I was actually okay with it! I drove to and from there...and the whole time. I'm happy that I got to learn the roads! I'm totally ready for the next trip! I'm just not sure if I want to go again! I'm the kind of person that would rather go sip on wine in a vineyard in Napa rather than party and drink at Vegas. I'm not much of a party person...I just prefer peace, relaxing, and taking it slow!

Black Bean Chocolate Chili Cookie
So today I made Black Beach Chocolate Chili Cookies! Yes, cookies made from black beans...no flour required! I was really amazed that these actually turned out well. If you have a health savvy friend or mom or aunts like I do, these are the PERFECT cookie for them. It has all the substitutes that are amazingly healthy - coconut oil instead of butter and chia seeds in place of eggs. Basically, this is a vegan cookie...well it could be, if only I didn't use honey!

**ALERT - nerd time - skip if you don't want to learn about oils and fatty acids**
You may substitute butter or shortening in place of the coconut oil. Coconut oil is not a very common item in the regular household...but I guess my house is pretty weird. I think about a year ago, my brother went on the Paleolithic diet where you are not allowed to eat any kind of carbs such as bread. You also were recommended to use coconut oil in place of butter. Coconut oil is mostly a saturated fat that is a solid at room temperature and is not hydrogenated, meaning it has no trans fat. It's better for you than butter and it's a lot better than hydrogenated oils which contain trans fats...information like this makes me want to take organic chemistry again... Consuming trans fats increase the bad cholesterol in your body which may lead to atherosclerosis (clogged arteries). Additionally, coconut oil contains no cholesterol since it comes from coconuts. Basically, this diet called for you to eat as if you were from back in the day where processed food land did not exist and all you had were simple foods.

This recipe actually calls for cayenne pepper. I'm actually a bit of a wimp when it comes to anything spicy. After I took the first bite, the spice got to me...when my mom took the first bite, she didn't feel a thing. Sometimes I envy people who can eat spicy foods to their hearts content! :(

Before baking
This recipe is from My New Roots

Black Bean Chocolate Chili Cookies:
Makes about 9 cookies

Ingredients:
1 ½ cups black beans, very soft (or one 15 oz. can)
2 Tbsp. coconut oil (or ghee)
1/3 cup organic cocoa powder
1/4 tsp. coarse sea salt, plus more for sprinkling
1/4 tsp. cayenne pepper

1/3 cup maple syrup (or honey, agave)
2 Tbsp. chia seeds (or use 2 Tbsp. ground flax seeds OR 2 eggs)
1 tsp. vanilla extract

1/3 cup chopped dark chocolate (80% or higher)

Directions:
1. Preheat oven to 375°F. Line a baking sheet with parchment paper.
2. Mix chia seeds, maple syrup, and vanilla in a bowl and set aside. If using eggs, skip this step.
3. Place drained and well-rinsed beans, coconut oil, cocoa, salt and cayenne in a food processor and blend until well combined. Add maple syrup and chia mixture (or eggs) and pulse to incorporate. The batter will be quite liquid-y, but still hold together. Remove blade from the food processor and add chopped chocolate Fold to incorporate.
4. Spoon cookie batter onto lined baking sheet. Using the back of the spoon, flatten top of cookies slightly, as they will not spread when baking. Sprinkle with coarse sea salt. Bake for 15 minutes until the edges are browning. Cool and eat. Store in the fridge.

Black Bean Chocolate Chili Cookies

Sunday, June 17, 2012

District 4 Bread - The Hunger Games - Attempt #2

District 4 Seaweed Bread
So I tried to make the District 4 Seaweed Bread again. (find the recipe HERE) This time, it came out perfect! Everything I read in the book came true! It resembles the book's bread almost to par...it's actually tinted green with seaweed! I'm so happy with it. It tastes a lot like seaweed and they're so soft and amazing.

Make sure to boil the seaweed until it is soft. This is so it will blend together well. Make sure that you make a paste with the seaweed. You should use all of the 1/2 cup. I also used the water that I boiled the seaweed in to proof my yeast. I think it gave it somewhat of a stronger seaweed flavor. If you like seaweed, this step is a must.

It really does turn out amazing!

District 4 seaweed bread before putting it in the oven
They actually look like fish this time!

District 4 Seaweed Bread Fully Baked!


Kale Hummus

So yesterday was actually the first time I ever dyed my hair! I've been obsessed with this ombre look lately and I wanted to try to do it myself instead of going to a salon to spend the big bucks. Since I didn't want to ruin my hair with chemical hair dye/bleach, I tried henna hair dye. Henna is actually a plant-based product that is used for dying hair, skin, nails, wool, etc. I figured since it was natural, no damage would be done to my hair and I could continuously use it without having to worry about chemicals entering my body. I used this brand from Surya that I bought at Mother's Market. Unfortunately, it didn't work that much for me because I have black hair :(. I can see it a bit, maybe next time i'll try a lighter color.


I also started making one of my best friend's birthday cakes. It's kind of a surprise though, so no one actually knows I'm making one for her. She's turning 21 so I wanted to make something special. I tried to make a Pomeranian... but it did not come out too well. I hope at least it looks like a dog? :/ It's supposed to be sitting on a rug. Oh well, this is my first time making a dog or anything like this. I wish I had pink food color! No tongue! :( 

Anyways, Happy Father's Day to all the fathers out there! My family had a small get-together today and as always, there was a lot of food! Some dishes included grilled fish, grilled chicken, steak, hummus pizza, and some other Filipino dishes. 

Speaking about hummus pizza...I made it myself, with homemade hummus! :D I made it with a bit of kale because kale is good for you! Haha...there was actually no reason except for that I had a lot of kale. The market I bought it at had it on sale for 2/99 cents and I couldn't resist buying 2. 

Here's the hummus recipe I used. I added kale to it when I put everything in the food processor.


Kale Hummus

Ingredients:
2 cups canned garbanzo beans, drained
1/3 cup tahini
1/4 cup lemon juice
1 teaspoon salt
2 cloves garlic, halved
1 tablespoon olive oil
1 pinch paprika
1 teaspoon minced fresh parsley
1/2 cup kale

Directions:
  1. Place the garbanzo beans, tahini, lemon juice, kale, salt and garlic in a blender or food processor. Blend until smooth. Transfer mixture to a serving bowl.
  2. Drizzle olive oil over the garbanzo bean mixture. Sprinkle with paprika and parsley.

Saturday, June 16, 2012

In-N-Out Inspired Hamburger


I was really craving hamburgers today. I really don't know why. But most of all, I wanted an In-N-Out burger!

[via]

In-N-Out burger is a fast food burger chain that is only found on the west coast of the United States. They really only have 3 burgers on the menu, a regular burger, cheeseburger, and a double-double (double meat/double cheese), but there's also a secret menu. People can order anything from a 4x4, four meat/cheese), Protein style (without the bun), and their most popular animal style (grilled onions and mustard-fried patty)

I always get animal style. I love their spread! And when I finally found a recipe that was close to it, I knew what I had to do!


Make it for myself! Although...Vegenaise does not produce the same consistency as mayonnaise. So it was too thin...


Grilled onions were also a must! 

I had everything EXCEPT cheese! My family has a tendency to not eat cheese and I totally forgot when I was going grocery shopping that I would need to get some. So that's why there's no cheese on my burger...I also forgot to grill the patties with mustard and to brown the buns.

Despite the mishaps, it tasted amazing! Especially with my homemade buns. Recipe here.

I ended up using single hamburgers instead of making double-doubles. I also used ground turkey instead of beef. All my family loved it, and it tasted almost exactly like a burger from In-N-Out. Ahh, my mouth is watering again!

Enjoy!

Recipe from Kenji at Serious Eats.

In-N-Out Double Double Burger:
Yields 2 1/4 lb burgers

Ingredients:
1/2 pound ground beef
1 egg white
1/2 tsp vegetable oil
1 large onion, finely chopped (about 1 1/2 cups)
Kosher salt
2 tablespoons plus 2 teaspoons mayonnaise
1 tablespoon ketchup
2 teaspoons sweet pickle relish
1/2 teaspoon sugar
1/2 teaspoon distilled white vinegar
2 soft Hamburger buns
Freshly ground black pepper
8 dill pickles chips
2 quarter-inch-thick slices ripe tomato
2 leaves fresh iceberg lettuce, white core section removed, torn to bun-sized pieces
1/4 cup yellow mustard
4 slices deli-cut American Cheese

Procedures:
  1. Preheat the oven or toaster oven to 400 degrees while you cook the onions: Heat 1 teaspoon oil in a 10-inch non-stick skillet over medium-high heat until shimmering. Add onions and 1/2 teaspoon salt to skillet. Reduce heat to medium low, and cook, tossing and stirring occasionally until onions are well browned, about 15 minutes. Once onions begin to sizzle heavily and appear dry, add 1 tablespoon water to skillet and stir. Continue cooking until water evaporates and onions start sizzling again. Repeat process, adding 1 tablespoon of water with each iteration until onions are meltingly soft and dark brown, about 3 times total. Transfer to a small bowl and set aside.
  2. Make the sauce: Combine mayonnaise, ketchup, relish, sugar, and vinegar in small bowl. Stir to combine.
  3. Place closed buns in preheated oven for 2 minutes until slightly darkened and crisped. Heat 1/2 teaspoon oil in 12-inch non-stick skillet or griddle over medium-high heat until shimmering. Open buns and add face-down to skillet. Toast until dark brown around the edges, about 1 minute total.
  4. Mix meat with egg white. Add some salt and pepper. Form ground beef into four 2-ounce patties, using damp hands to press each into a patty about 3/16ths of an inch thick and 4 inches wide. Season generously with salt and pepper. Add remaining 1/2 teaspoon oil to pan, swirl to coat, and heat over medium-high heat until lightly smoking. Add burger patties and cook without moving until well browned and crusty on first side, about 2 1/2 minutes. While they are cooking, spread 1 tablespoon mustard on raw side of each patty with a spoon. Meanwhile, top each bottom bun with up half of spread, 4 slices pickles, 1 slice tomato, and lettuce. Flip patties with a thin spatula so mustard side is down and continue to cook for 1 minute. Top each patty with a slice of cheese. Divide onion mixture evenly between two patties. Place the other two patties directly on top of the onions , sandwiching them between the beef. Transfer patty stacks to bottom bun. Top with top bun, and serve immediately.

Hamburger Buns


The bread just keeps coming!

Since I was making hamburgers today, I also decided to make my own hamburger buns. It was work, but it was worth it to save the extra money that I would have spent buying buns. Yeah, I'm kinda cheap. If I ever got the chance, I would totally work if I got free good food. This is why I always volunteer at food events! Free food!!!

These buns were pretty good. It went perfectly with my burgers! Yum. I was going to put sesame seeds but then I realized we didn't have anymore. I also just microwaved the milk and water. Enjoy!

This recipe is from LemonLush.

Belle's Hamburger Buns:
Yields 12 buns

Ingredients:
1 cup milk
1 cup water
2 tablespoons butter
1 tablespoon white sugar
1 1/2 teaspoons salt
5 1/2 cups all-purpose flour
1 (.25 ounce) envelope active dry yeast
1 egg yolk
1 tablespoon water

Directions:
  1. Combine the milk, 1 cup of water, butter, sugar and salt in a saucepan. Bring to a boil then remove from the heat and let stand until lukewarm. If the mixture is too hot, it will kill the yeast.
  2. In a large bowl, stir together the flour and yeast. Pour in wet ingredients and stir until the dough starts to pull together. If you have a stand mixer, use the dough hook to mix for about 8 minutes. If not, knead the dough on a floured surface for about 10 minutes. Place the dough in a greased bowl, turning to coat. Cover and let stand until doubled in size, about 1 hour.
  3. Punch down the dough and divide into 12 portions They should be a little larger than a golf ball. Make tight balls out of the dough by pulling the dough tightly around and pinching it at the bottom. Place on a baking sheet lined with parchment paper or aluminum foil. After the rolls sit for a minute and relax, flatten each ball with the palm of your hand until it is 3 to 4 inches wide. You may want to oil your hand first. Set rolls aside until they double in size, about 20 minutes.
  4. Preheat the oven to 400 degrees F (200 degrees C). Mix together the egg yolk and 1 tablespoon of water in a cup or small bowl. Brush onto the tops of the rolls. Position 2 oven racks so they are not too close to the top or bottom of the oven.
  5. Bake for 10 minutes in the preheated oven. Remove the rolls from the oven and return them to different shelves so each one spends a little time on the top. Continue to bake for another 5 to 10 minutes, or until nicely browned on the top and bottom.

Friday, June 15, 2012

Cinnamon Roll Cupcakes


I just realized that I've been making a lot of desserts that require yeast lately. Kinda surprised because I never used to use yeast! At least i'm putting that bag of it to good use, yeah?! 

So for today, I decided to make cinnamon rolls! I love cinnamon rolls, especially the ones from Cinnabon! The only downside = the enormous amount of sugar that goes into it. But what's a dessert without sugar right?

These are the cupcake version, I decided not to make the cream cheese frosting because I didn't really want sugar overload. It kind of makes me sad to say that, but it's true! For lent, I gave up sweets entirely. After those 40 days, I realized how much sugar I actually put into my body and how tolerant I've become to it. Everything I ate became too sweet after that, thus I tweaked up my lifestyle to incorporate less added sugar desserts and more sweets that were mostly based on natural sugar. But I do still love my sugary desserts! Just in moderation.

I advise you to use all the cinnamon sugar and the butter because it makes it taste a bit better. I didn't use all of it and it wasn't as cinnamon-y as I would like. I made 12 cupcakes (double-lined) and just put the rest in a cake pan. I freezed the ones in the cake pan after baking so I could eat them at a later time.

I ate 3 of these rolls. Now I feel so so guilty! They were just too delicious! :(

This recipe is from La Fuji Mama


Cinnamon Roll Cupcakes:
Makes 24 cupcakes

Ingredients:
2 1/4 tsp. or 1 packet (1/4 oz./7 g) dry active yeast
1/2 cup granulated sugar, divided
1 cup warm milk (approximately 110 degrees Fahrenheit)
2 eggs, room temperature
1/3 cup butter, melted
1 tsp. salt
4 1/2 cups bread flour

1 cup brown sugar, packed
2 1/2 Tbsp. ground cinnamon
1/3 cup butter, softened

Procedure:
  1. Dissolve yeast and 1/4 cup of the granulated sugar in the warm milk in a large bowl and let stand for about 10 minutes until foamy.
  2. Mix in the eggs, butter, salt, and other 1/4 cup of granulated sugar. Add flour and mix until well blended and the dough forms a ball. Put in a bowl, cover and let rise in a warm place until doubled in size (about one hour).
  3. After the dough has doubled in size, turn it out onto a lightly floured surface, cover and let rest for 10 minutes. In a small bowl, combine brown sugar and cinnamon. Line cupcake pan with cupcake liners, and lightly spray over the top of them with cooking spray.
  4. Roll dough into a 12×22 inch rectangle. Spread dough with 1/3 cup butter and sprinkle evenly with sugar/cinnamon mixture. Roll up dough and cut into 24 rolls
  5. Place each roll in a cupcake liner. Cover and let rise until nearly doubled, about 30 minutes. Meanwhile, preheat oven to 400 degrees Fahrenheit.
  6. Bake rolls in preheated oven until golden brown, about 10-12 minutes. Let rolls cool completely before frosting (or else the frosting will melt and slide off).

Frosting:
2 (8-oz.) packages cream cheese, softened
1/2 cup butter, softened
2 1/2 cups sifted confectioners’ sugar
2 tsp. vanilla extract

In a medium bowl, cream together the cream cheese and butter until creamy. Mix in the vanilla, then gradually stir in the confectioners’ sugar. Store in the refrigerator after use.

Cinnamon Roll Cupcakes

Wednesday, June 13, 2012

Peeta's Raisin and Nut Bread - The Hunger Games

My sleep schedule has been way off lately! This is why I do like having classes during summer. When I have nothing to do, I tend to sleep late catching up on lost TV and movie time. Yesterday, I actually caught up on Love in the Wild and Smash! I love reality shows and shows that pertain to talent and broadway. *Ahem, Glee*! I guess you could say I've been on a late night baker's schedule? I sleep at around 6am and wake up way too late. But there are upsides to it! Like this bread that I made!

When anyone thinks of food from The Hunger Games, it's usually either the Katniss' favorite lamb stew from the Capitol or some kind of bread.  Bread it is! Haha! I'll try to make the lamb stew some time in the future! 
[via]
This bread that I made today was the raisin and nut bread that Peeta burned and tossed at Katniss that eventually saved her life. This act of kindness that Peeta showed towards Katniss gave her the sense of hope and the willingness to continue living and make her life better. 

The version I made of his bread was a bit dense...i'm still thinking about what it was from, possibly the oatmeal I added. Maybe it was because I cheated on the rising time? (*most likely) Ahh, the curses of being an amateur baker; you don't know what you're doing wrong! I used half white flour and half whole wheat flour. I didn't have any raisins on hand so I used dried cranberries and dates instead. Additionally, I added a bit of orange zest for an extra zing. It's not exactly like the book describes it, but I wanted to make something that my whole family would eat! This is definitely a hearty bread! It's full of protein and fiber! It actually tasted great! The dates and cranberries added a lot of sweetness.

The next time I make this, I will try to make it a more slender loaf. I'll also try to let the dough rise a lot longer, maybe 5-8 hours. I've been too impatient lately, but I'll make sacrifices to make good bread!

Peeta's Raisin and Nut Bread

Peeta's Nut and Raisin Bread:

Ingredients:
1/2 cup cooked oats
1 cup water
1 tsp white sugar
1 1/2 tsp yeast
1 1/2 tbsp vegetable oil
1 1/2 tbsp honey
1/2 tsp salt
3/4 cup whole wheat flour
1 1/2 cups all-purpose flour
1/2 cup chopped dates
1/2 cup raisins, or dried cranberries
1/2 cup chopped walnuts

Directions:
  1. Cook oatmeal until done, about 3 minutes.
  2. Proof the yeast: Dissolve sugar in warmed water. Add yeast to mixture. You know your yeast is active if it forms bubbles. 
  3. Mix cooked oats, vegetable oil, honey, salt, dates, raisins, and walnuts into the yeast mixture.
  4. Sift together whole wheat flour and all-purpose flour.
  5. Combine flour and yeast mixture until well incorporated.
  6. Knead the dough on a floured surface until smooth.
  7. Place dough in an oiled bowl and cover loosely. Set in a warm place and let rise for around 2 hours.
  8. Punch dough down and divide into 2.
  9. Form long loaves and dust with flour. Place on a dusted cookie sheet. Cover loosely and let rise for another 2 hours. 
  10. Preheat oven to 400F
  11. Bake for 30-35 minutes or until loaves are a nice brown color.
Peeta's Raisin and Nut Bread Slices!


Sunday, June 10, 2012

Macarons Attempt #1

Image from theroar.com.au
Did anyone watch the Pacquiao vs. Bradley fight yesterday? We had a whole party for it like all other Pacquiao fights. The results were ridiculous considering that Pacquiao was in the lead for basically all of the rounds! It was just so surprising! Especially when Bradley even admitted that he would have to look over the tapes to see if he had really won. Maybe its because of money? Or is boxing just a failed sport? I guess all you can blame is the judges for now!

Also, wasn't this the most awkward pose? If someone accidentally bumped in to one of them, then BAM! Kiss right there! HAHA. Bradley just kept moving closer and closer. Pacman still has that smile, as always!

This day was a little different though. It was also my dad's birthday! His actual birthday is today (June 10). Happy Birthday Dad!!! Also, after the fight, my cousin proposed to his long time girlfriend. It was really sweet! They're so in love, I hope they have a wonderful life together!

Anyways, today I decided to give a try at making macarons! It's actually a macaron, not macaroon! Macaroons are similar because they still use whipped egg whites; they are a meringue-like cookie, sometimes dipped in chocolate. The most known is the coconut macaroon. Now on to macarons! Macarons are what most people think of, they contain egg whites, almond flour, and sugar; they are characterized by their dome shape and their ability to melt in your mouth. Additionally, they are usually filled with a sweet cream, jelly, etc.

Surprising right? Well, the ones I made didn't turn out too well.


I always knew that macarons were difficult to make, but I didn't realize that it would be this difficult! Although they did taste great! I filled them with my own homemade almond butter since I was a bit lazy to make some buttercream. I will try this recipe again for sure! Before the end of summer, I plan on mastering this technique! :D

For anyone wondering, I used Martha Stewart's recipe for these little guys. I made my own almond flour by putting whole almonds in a coffee grinder. I also made my own super fine sugar by doing the same but with powdered sugar. Maybe next time, I'll actually go buy the flour! Maybe it'll turn out different? I hope so!

French Macarons:

Ingredients:
1 cup confectioners' sugar
3/4 cup almond flour
2 large egg whites, room temperature
Pinch of cream of tartar
1/4 cup superfine sugar

Directions:
  1. Pulse confectioners' sugar and almond flour in a food processor until combined. Sift mixture 2 times.
  2. Preheat oven to 375 degrees. Whisk whites with a mixer on medium speed until foamy. Add cream of tartar, and whisk until soft peaks form. Reduce speed to low, then add superfine sugar. Increase speed to high, and whisk until stiff peaks form, about 8 minutes. Sift flour mixture over whites, and fold until mixture is smooth and shiny.
  3. Transfer batter to a pastry bag fitted with a 1/2-inch plain round tip, and pipe 3/4-inch rounds 1 inch apart on parchment-lined baking sheets, dragging pastry tip to the side of rounds rather than forming peaks. Tap bottom of each sheet on work surface to release trapped air. Let stand at room temperature for 15 minutes. Reduce oven temperature to 325 degrees. Bake 1 sheet at a time, rotating halfway through, until macarons are crisp and firm, about 10 minutes. After each batch, increase oven temperature to 375 degrees, heat for 5 minutes, then reduce to 325 degrees.
  4. Let macarons cool on sheets for 2 to 3 minutes, then transfer to a wire rack. (If macarons stick, spray water underneath parchment on hot sheet. The steam will help release macarons.)
  5. Sandwich 2 same-size macarons with 1 teaspoon filling. Serve immediately, or stack between layers of parchment, wrap in plastic, and freeze for up to 3 months.

Saturday, June 9, 2012

Perry the Platypus Inaction Figure

Hello! So I found out that I'm still on the wait list at my university for nursing. I moved up a lot, but am still on it. It's kind of upsetting that they're giving me false hope. It was orientation today and all I felt was that I shouldn't be there. I'm not even accepted into the program yet. But all I can do for now is wait. I have a back-up plan. My dreams are almost there, I can almost reach it, not quite, but I'll get there somehow. No matter what twists and turns my life takes, the only thing I can do is go with it and pray for the best!

Perry the Platypus Inaction Figure

Today I'd like to share with you a project I did a while back! It's one of my favorite crafts, especially since its Perry the Platypus from Phineas and Ferb! This show is brilliant! No matter what age you are, you'll find something to love about this show! On one episode, Phineas and Ferb attempt to become toy makers because toys they found would quickly become boring and monotonous. They design a toy that doesn't do anything, therefore, can do anything that they imagine; a toy that was "so stupidly simple, so basically bland, so idiotically uncomplicated, that it can do absolutely anything." Hence, Perry the Platypus Inaction Figure was born!

As a huge fan of this show, I wanted my own inaction figure! What better way to have it than to make it! Although it's not an exact replica of the figure, it's still amazing in it's own way. It actually DOES something!


Voila! You can open it to find a neat little storage compartment for your little knick-knacks! Cool huh? Well I thought so! 

This project is actually very simple, and not very costly. You could probably make around 5 of these little guys for under 8 bucks.


Components:
Sculpy oven-bake clay in mustard yellow and dark orange
2 screws
Teal craft paint
Small wood box
Wood yard stick, around 1 1/2 cm in width
Small saw or knife
Sandpaper
Wood glue
Googly eyes

Directions:
  1. Cut 1 inch pieces off of the wood stick and sandpaper both ends until smooth. This will be Perry's legs.
  2. Paint all wood pieces teal, apply 2 coats.
  3. With the mustard yellow, make the beak by rolling a small amount of clay into a flat oval shape and fold in half. To make the tail, make a shape almost like a circus peanut, or a thumb. Score the tail to get the tail look.
  4. Bake clay pieces as directed.
  5. Glue dry wood legs onto the box, leaving around 3/4 inch hanging.
  6. Mark the area that you would like your clay pieces to be. Mine were around 1/2 cm beneath the opening of the box.
  7. From the inside of the box, screw together the box and the screw until it gets to the painted side. Next, screw on the clay pieces.
  8. Glue 2 googly eyes above the beak.
That's it! There you have your Perry the Platypus Inaction Figure! So simple and so cute! Sorry though, my directions are not too great! But I hope you get the gist of it!


Friday, June 8, 2012

District 11 Bread - The Hunger Games

District 11 Bread
Hello! So as promised, I made District 11 bread! Their main industry is agriculture and you can tell because of the descriptions of the fields of crops, orchards, and dairy cattle that are in the book. They produce all the crops that go to the capitol. District 11's bread is described as a crescent-shaped roll made from a dark ration grain that's sprinkled with seeds. Naturally, I thought of sunflower seeds since there are fields of wildflowers spread throughout the district. District 11's bread plays a huge significance in the first book, although it's not prevalent in the movie adaptation.

For the bread, I used part rye flour and part whole wheat flour to give the bread a characteristic dark shade.  I incorporated seeds on both the inside and the outside of the bread. The bread was very sticky, so I had to add a lot of extra flour when kneading. It will take a bit longer to rise because rye flour has a very low gluten content, hence me adding whole wheat flour along with it. I also used agave nectar instead of the honey. While making the bread, I kept thinking about nutrition since most of my family members are trying to eat healthier. Therefore, I tried to make it as healthy as I could. It's a huge list of ingredients, but the end results are amazing! They were a little dense, but they were still good! Would be a great dinner roll, especially since it's such a hearty loaf! I adapted this recipe from Pippis in the Kitchen Again.


District 11 Crescent Rolls:
Yields approx 17 rolls

Ingredients:
1/2 cup boiling water
1/2 cup oatmeal
1/2 cup milk

2 1/3 cup warm water
1 package yeast (2 1/4 tsp)
1 tbsp white sugar
3 tbsp honey, or agave nectar
3 tbsp vegetable oil
1 1/2 tsp salt

3 cups whole wheat flour
2 1/2 cups rye flour
1/2 cup sunflower seeds
1 1/2 tbsp poppy seeds
2 tbsp ground flax seed

1 egg (egg wash)
2 tbsp sunflower seeds
1 tbsp poppy seeds
1 tbsp flax seeds

Directions:
  1. Cook the oatmeal in the boiling water for about 3 minutes. Let cool. Mix in milk.
  2. Proof the yeast: Dissolve sugar in warmed water. Add yeast to mixture. You know your yeast is active if it forms bubbles.
  3. Mix in cooled oatmeal, honey, vegetable oil, and salt once the yeast is proofed.
  4. In a separate dish, add whole wheat flour, rye flour, sunflower seeds, poppy seeds, and ground flax seeds. Mix together until well combined.
  5. Mix in flour mixture to yeast mixture 1 cup at a time until all the flour mixture is well incorporated.
  6. Knead the dough on a floured surface until smooth. This might take a bit more flour than anticipated.
  7. Place dough in an oiled bowl and cover loosely. Set in a warm place and let rise until doubled, around 1 1/2 hours.
  8. Punch dough down and let rise for another 30 min.
  9. Preheat oven to 375F.
  10. Punch dough down again and divide into even pieces. Form each piece into a triangle and roll into a crescent shape. Start from the wide end and roll towards the tip.
  11. Cover loosely and let rise for another 15 min.
  12. Brush egg wash onto each roll and cover with a combination of sunflower, poppy, and flax seeds.
  13. Bake for 20 minutes, or until golden brown, rotate half way through.
  14. Remove and let cool for 5 min, then transfer to a cooling rack.
District 11 Bread, sprinkled with seeds!


Wednesday, June 6, 2012

Antiqued Frames

Hello all! So today I went to the Natural History Museum and I finally saw real dinosaurs! Well, you know, the bone structure and all. It was amazing! The ones that stood out most were the ones at the museum hall entrance, a T-rex and a triceratops! They also had a preserved coelacanth, which is a fish that was thought to be extinct but showed up in Africa! I didn't know they were real! The gigantic fish that I always wanted to catch in Animal Crossing for Gamecube! HAHA Oh, how I miss those days!

Definitely a day well spent, although I was kind of sad that I got tired so fast! I guess when you get older, you start to get tired more easily? Maybe that's why my parents were always so tired when we spent the day at the amusement park! I now understand how they feel...and I also understand why they never want to go on all the rigorous rides! When I was little, I used to be able to ride roller coasters 6 times in a row without feeling sick at all! But now once I ride it once, it's all over! :( Now I find myself taking dramamine every time I go to amusement parks or long car rides.

Speaking of antique and extinct, let's get to my frames! HAHA So I guess I've jumped on to this retro bandwagon that's been going on for quite some time now! Vintage and antique items! I simply adore them! They make everything look more chic and unique and bring so much character! When we moved to our new house, I wanted all my furniture to be vintage looking. Unfortunately, I failed, but I was still able to get a nice vintage inspired desk from Pularski.

With that said, I had no idea what to put on my walls! I finally decided that I would just paint some old frames that no longer matched our furniture and wahlah! My antiqued frames came to life!

 :D This was actually my first time that I antiqued anything so I didn't know what to expect. It actually turned out okay!

Here's what you need:
Wooden frames
Paint (brown, yellow,green, white)
Brushes/foam brushes
Crackle medium
Sandpaper

It's actually really simple. You start off the first coat with brown paint. Once dry, paint spots of green and a little bit of yellow. After, apply crackle medium to areas of the frame. The top coat painted after the medium dries with white. After just sandpaper your frames to give it an older distressed look.

I know that I didn't explain it well, but it's actually easier to Youtube it! If anyone has any tips on antiquing, please tell me! I would like to antique a small side table! I have yet to put these on my wall since I have no inspiration on what to frame! I feel like putting a black background like the picture below would be too dark! We'll see!

Anywho! Thanks for reading! Just a heads up, I'm going to be doing another Hunger Games bread! District 11! So watch out for that! :D


Monday, June 4, 2012

District 4 Bread - The Hunger Games


District 4 Bread
**EDIT: I made this bread again and it came out perfect - Click HERE for the results**

Hey all! So recently I've been overly obsessed with The Hunger Games! I read the trilogy in only two days because I couldn't put the books down! They're amazing! I see myself constantly checking pages again and again! I even had to read the ending around five times! I was so surprised I was able to get through them, especially since I haven't picked up a book willingly for around 9 years! (I know, so sad!) These books have definitely inspired me to read more! TEAM PEETA x1000000gazillioninfinitybeyondforever!

I was actually one of those people that haven't read the book before watching the movie! But lemme tell you, they're both equally amazing...even though I have yet to watch the first half of the movie (due to an incident with my friends and I)! I was just sad that the movie didn't have a lot of aspects that were in the book! But I'm just judging on the part that I did watch. (Don't worry, no spoilers)

So anyways, one of the main themes in the book is bread! Each district has a specific bread they make based on their industry. The bread that I liked reading about the most was from the fishing district, District 4. In the book, District 4's bread is described as a salty, fish-shaped loaf that's tinted green with seaweed. I loved the seaweed!


I used fresh seaweed that came from my family in the bay area. If you don't have that on hand, other recipes use re-hydrated dried wakame which you can find at any local Asian market. Unfortunately, my loaves did not look enough like fish and I did not get enough seaweed flavor for my tastes! I was also unable to get the green tinge that I wanted (probably because I used fresh seaweed), but I'll definitely attempt this recipe again; it was a hit with my family and friends.

Recipe adapted from The Magic Kitchen.

District 4 Seaweed Bread:
Yields approx 15 rolls

Ingredients:
  • 6 1/2 cups all-purpose flour
  • 2 1/2 cups warm water
  • 2 tbsp instant yeast 
  • 2 tbsp sugar 
  • 2 tbsp vegetable oil
  • 1 1/2 tsp salt
  • 2 cups fresh boiled seaweed, or 1/2 cup dried wakame
  • Water to brush on dough
  • Coarse Sea salt
Directions:
  1. Boil the seaweed. Drain and cool. Once cool, put in a blender or food processor until it has the consistency of paste.
  2. Proof the yeast: Dissolve sugar in warmed water. Add yeast to mixture. You know your yeast is active if it forms bubbles.
  3. After the yeast is proofed, mix in oil and salt.
  4. Mix in seaweed until well combined.
  5. Mix in flour and knead until smooth. Add flour one tbsp at a time as needed.
  6. Place dough in an oiled bowl and cover loosely. Set in a warm place and let rise until doubled, around 1 hour.
  7. Preheat oven to 400F.
  8. Punch down dough and let rise again for another 1/2 hour.
  9. Punch down dough and shape dough into a fish and let rise for another 15 min. Score the top of the bread with a sharp knife.
  10. Brush each fish with water and sprinkle the sea salt.
  11. Bake in oven for 20 min or until golden brown, rotate half way through.
  12. Remove and let cool for 5 min, then transfer to a cooling rack.
Best served warm!